


Editor’s Note: You asked, we answered. For two years in a row you told us in our Reader Survey that you wanted more DIY on Design Milk. So, without further ado, I’d like to introduce our newest contributor, Meg Kemner and her new monthly DIY column “Make It Modern: DIY”. Learn more about Meg on our About page. I welcome your feedback about this new column, too, so please share your thoughts in the comments or shoot me an email. Tell us what you want to see Meg make next! Enjoy!
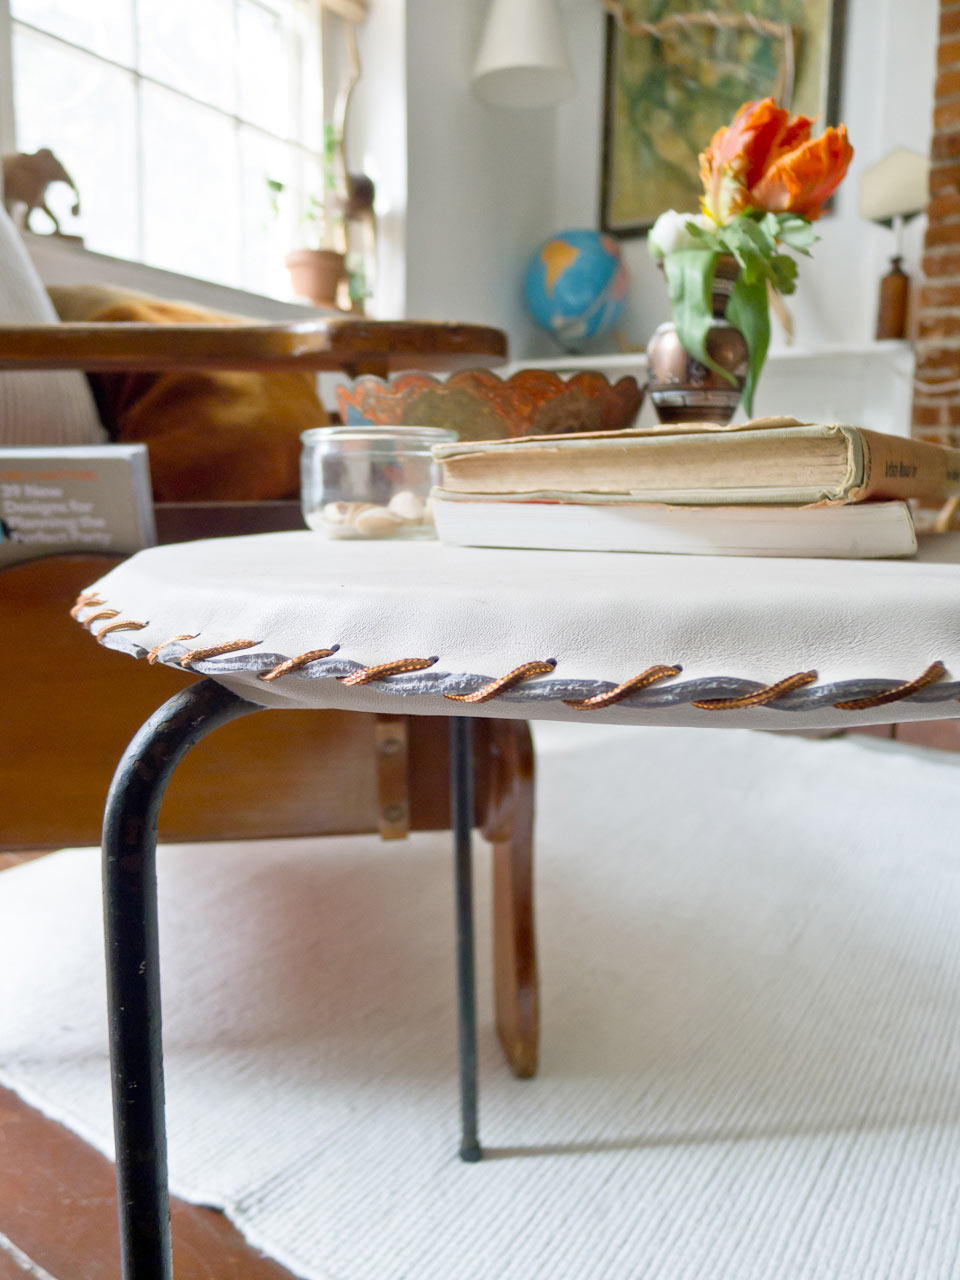
I love a good repurposing project, and thought a great way to kick off Design Milk’s new DIY column would be with something simple and adaptable. This DIY is a great way to add a custom, professional-looking touch to an inexpensive stool or side table, but its applications go far beyond.
You’ll need:

Supplies + Tools:
– a round stool or side table like this one from IKEA
– about 4-5 square feet of 4-8oz leather (good guide to leather weight here) OR a thick material like industrial felt
– about 3 yards of 2mm-4mm copper piping cord or leather string
– measuring tape
– a utility or craft knife
– a few binder clips
– a screw punch (optional – but it WILL make the project easier and it’s a lot of fun)
– a pencil
– a small pin
– low-tack drafting or masking tape
I was able to purchase most of my supplies for cheap at my local fabric store – it pays to look offline, if you get the chance. Also, quick note: If you’re using a screw punch, make sure the string or cord is small enough to fit through the holes. It’ll save you from having to get a different size halfway through your project, like I did.
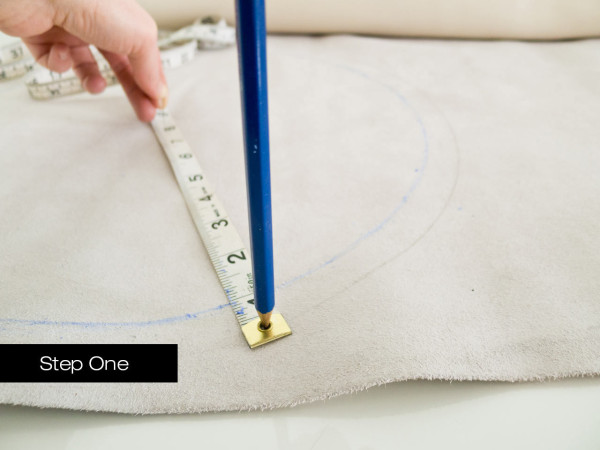
Step 1: Make the top and bottom cover. On the underside of your material, use a small pin as the anchor point and draw a circle that is the width of the stool top, PLUS the thickness. (EG, The stool I used was 15″ across, and 1″ thick = 17″). And then do it again, to make two circles.
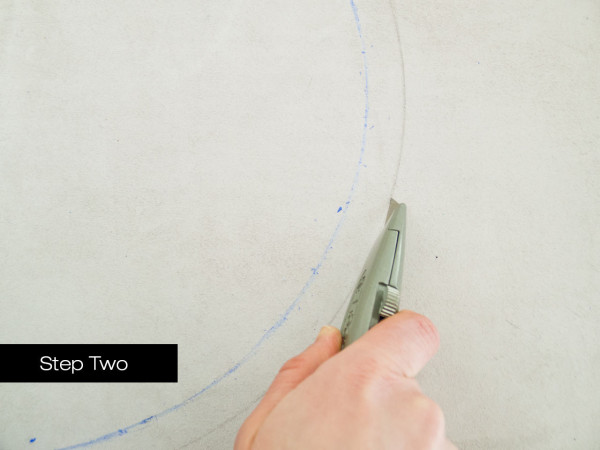
Step 2: Cut out the circles, being careful to keep the blade perpendicular to the material, and to keep your edges straight. Be patient. If you’re using leather, you’ll probably need to score it a few times this way. There are faster ways to cut it, but this will make sure you have a good, flat edge.

Step 3: Measure around the edge and, with your pencil, make a mark every inch or so, depending on how close you want your stitches to be.
Step 4: Stack the circles, with the outer-sides against each other (see Step 5B). Gently hold them in place with a few pieces of tape. You’re stacking them so that the holes you’re about to punch will line up correctly.
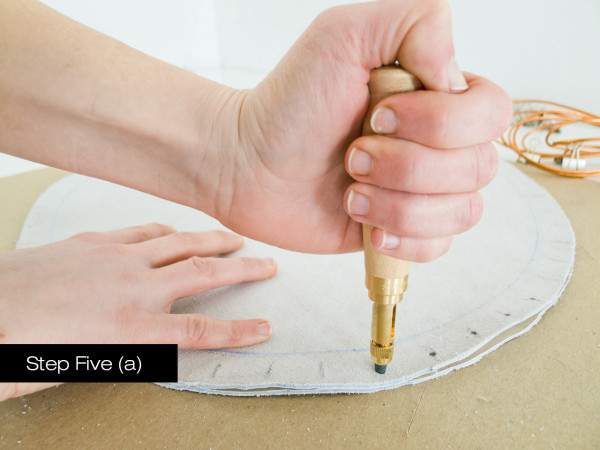

Step 5: Cut a hole at every mark, about ¼” in from the edge. If you’re using a screw punch, you might have to punch twice, depending on the material. If you’re using a craft knife, cutting a small X through each layer will do the trick. On each circle, make a mark or two so you know which holes should line up with each other.
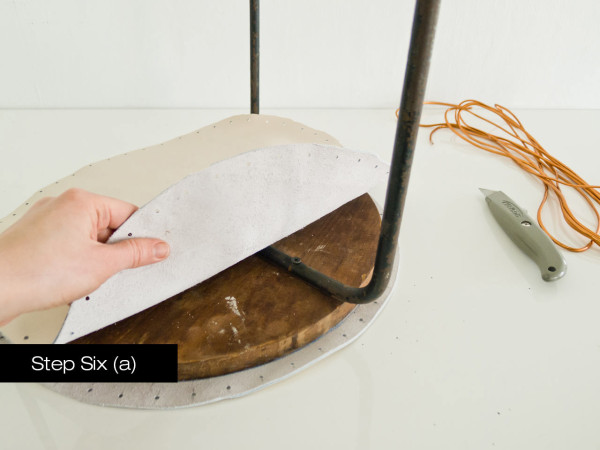
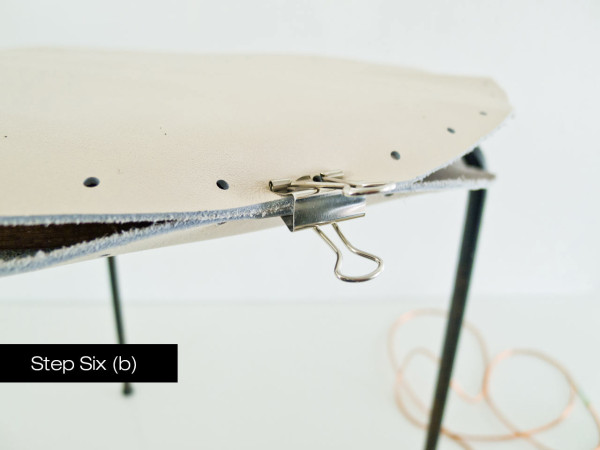
Step 6: Sandwich the seat of your stool between the circles, and line up the holes that correspond correctly. Make sure all of the legs end up between the stitching holes. Then clip the edges to hold the circles in place.

Step 7: Cut out a notch around each leg: Holding the material in place, run the knife along each side of the leg, about 1-2″ long, and then across the length. Be careful not to cut out any of the holes.
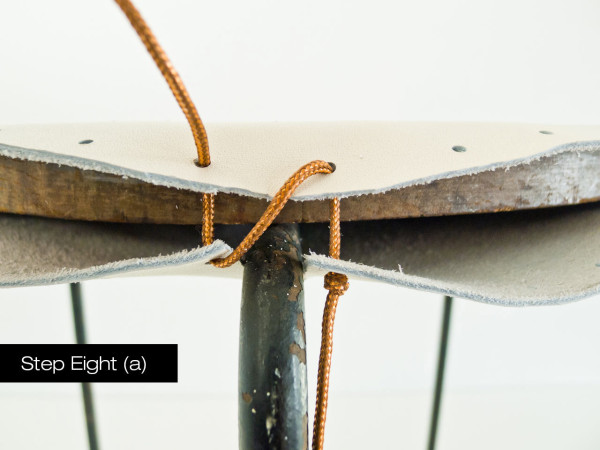
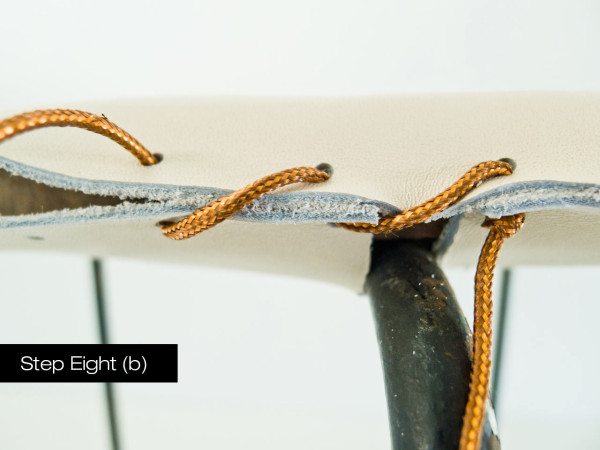
Step 8: Flip your stool back over, and tie a loose knot toward the end of the cording, leaving a 3-5″ tail. Thread as shown in Step 8A. As you stitch, make sure you pull the cording taut, and that you keep the edges of the material pressed so they make a nice clean, flat edge, as in Step 8B. Depending on what cording you use, you might have to tape the ends to help with the threading.
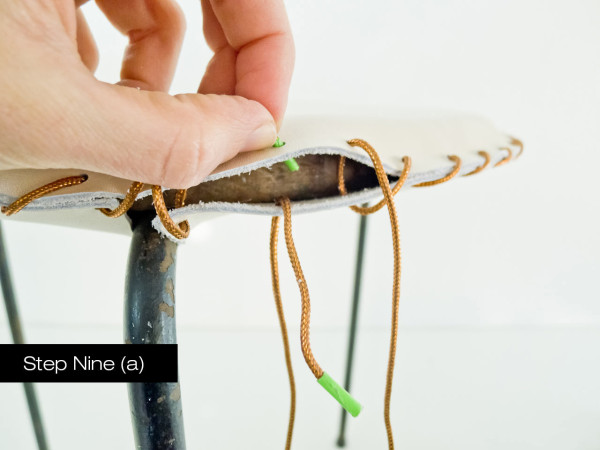
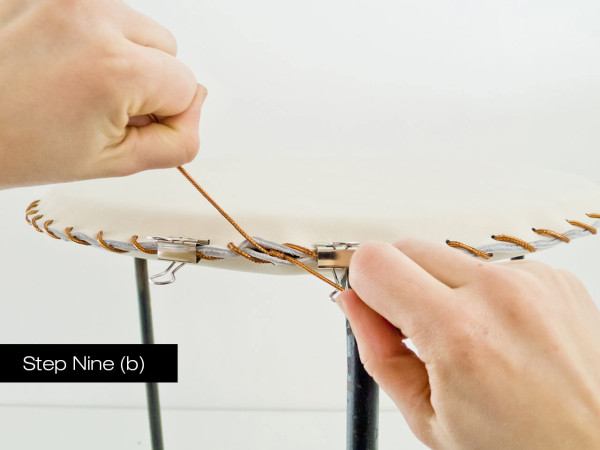
Step 9: When you get to the last hole, untie your knot, and thread this end through the hole before it, as in Step 9A. With the two ends, tie a secure knot, and fasten with glue if you’d like. Clip the excess cording, and tuck the knot back into the material.

I’m using mine as a side table, but if you really want to go for it, the method can be applied to almost any flat surface. It’d make an amazing coffee table, bench, or headboard – I’d love to see where people take it.