


Oh, the poor neglected dining chairs I see on trash night. Maybe you have a few sitting around the house—thrifted college furniture or your parents’ forgotten hand-me-downs that were about to be tossed… until they guilted you into bringing the whole set home. And they’re always the ones you can’t seem to get rid of! A spindle splits and pops out here or there and the chair is relegated to the corner until you can find a proper replacement.
I’m here to give you and all your cast-aside furniture a little bit of hope.
When you do a lot of DIY work, you end up with a lot of half-full paint cans, oddly-shaped fabric scraps, and yards and yards of extra rope. Even if you don’t have those extra bits and bobs laying around, the amount of materials this project takes is minimal and super low-cost, but yields a high-impact transformation. And! This might be the most simple, user-friendly DIY I’ve shared to date.
To update one chair, you’ll need:
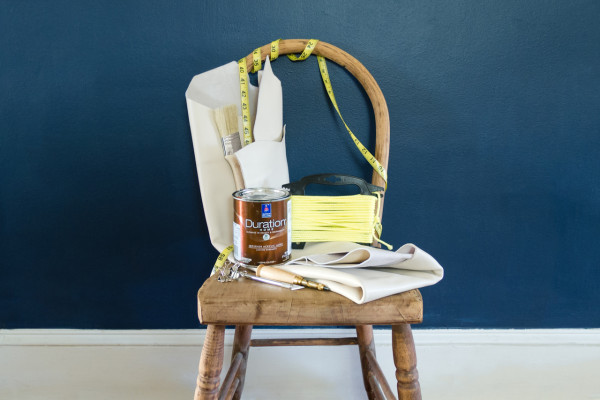
Supplies:
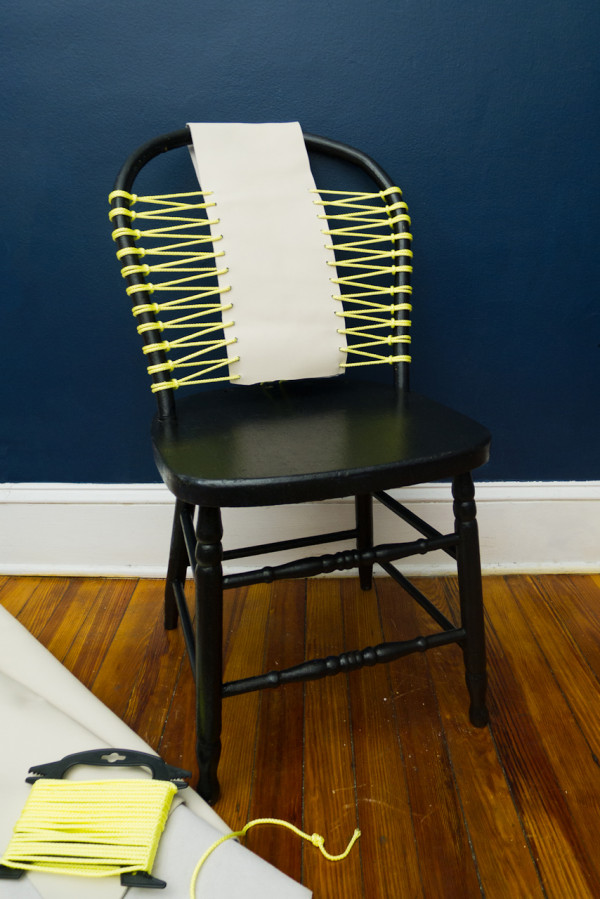
– a junky old chair that has a hoop-like back
– about a 4′ length of 7″ wide leather or canvas
(note: if you use canvas, you’ll have to use grommets)
– about 75′ of 5/32″ braided poly rope
– a screw punch (optional, but it will make your life so much easier)
– a craft knife
– measuring tape
– a pencil
– a few binder clips
and if you want an even more dramatic transformation,
– 1L of paint and basic painting supplies (a brush, maybe a drop cloth, paint tray, and painter’s tape)
Step 1:
Bust out any remaining spindles and paint the chair (if you so please). The spindles of my chair were long gone before I began this tutorial, but you should be able to cut through them with a hack saw and smack them out with a rubber mallet or hammer if need be. There are a million great tutorials online for refinishing wood and chairs, and since that can be a whole separate tutorial in and of itself, I’ve linked to a few of my favorite at the bottom of the post.
Step 2:
To determine the length of your leather panel, measure from an inch or two below the seat, up and over the center of the hoop, and back.
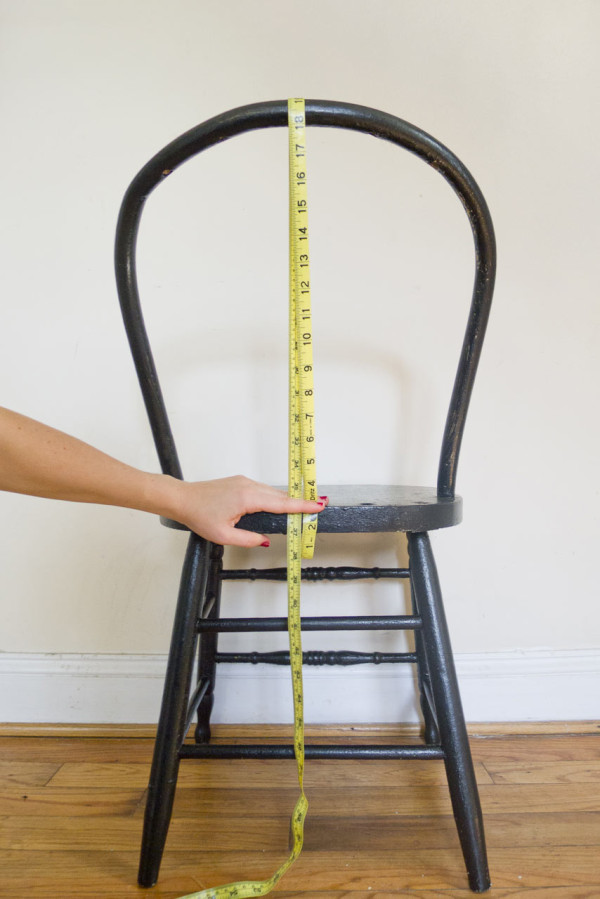
It’s better to have a little more than not enough – any excess can be cut off at the end.
Step 3:
Cut the leather panel to size, and fold the panel – inside out – over the top of the hoop.
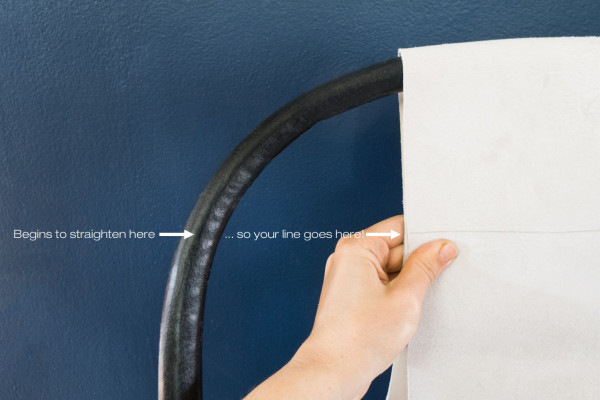
Make a mark where the hoop begins to straighten out and go vertical. This will indicate where you’ll put the top hole.
Step 4:
Taking the leather off the chair, flip it so the smoother side is facing outward, fold it in half, and secure with binder clips – two at the base, and two just above the inside line you just drew.
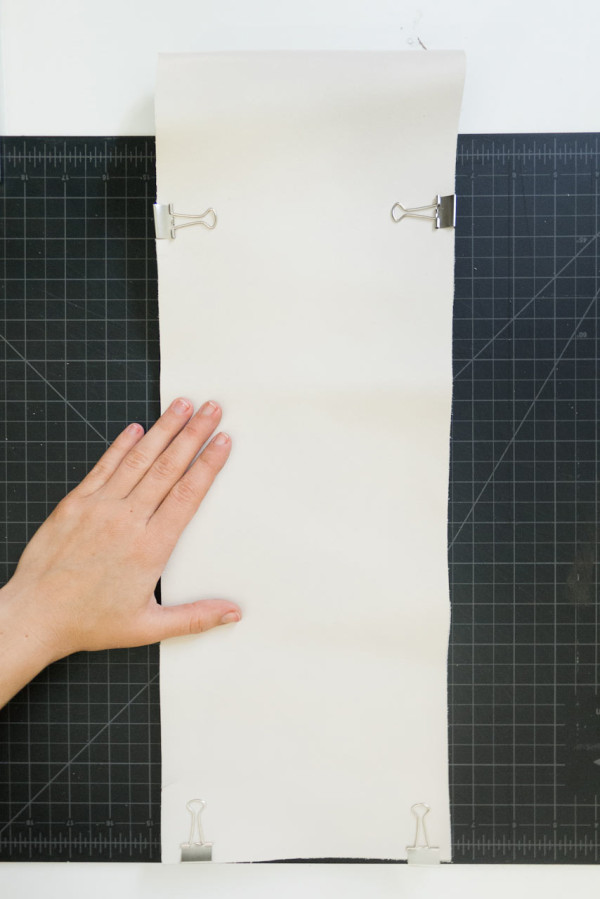
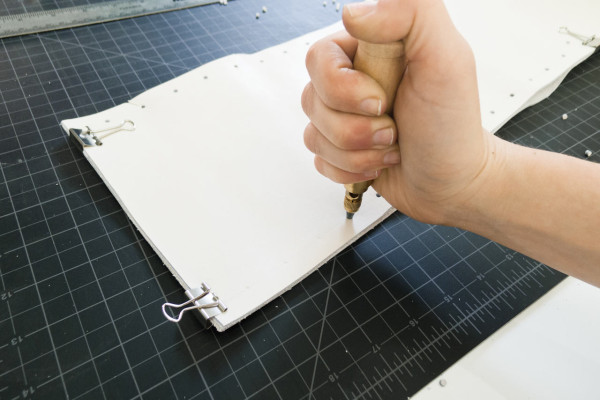
About 1/4″ in from the edge, make a dot at every inch by slightly indenting the leather with your pencil. If you don’t have a screw punch, you can cut horizontal slits with your craft knife. If you do have a screw punch, just punch right on top of each dot.
Step 5:
Place the leather, centered, over the top of the hoop. You can clip it in place for now, if you want. Take about, oh, 50′ of rope, find the center point (hold the two ends and run your hand up the rope until you’ve come to the fold), and tie a little knot so you know where that center point is.

Begin weaving by threading each end of rope through the two top holes, from the back. Untie the knot and pull taut from both sides.
Step 6:
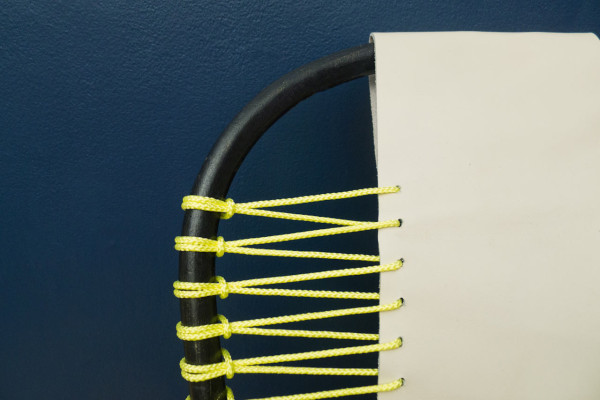
Holding the rope taut, you’re going to hitch it to the hoop.
I should note that you CAN just zig-zag the rope from the hole to the loop and back, but the hitch will be much more secure (and I personally like how much more “finished” it looks).
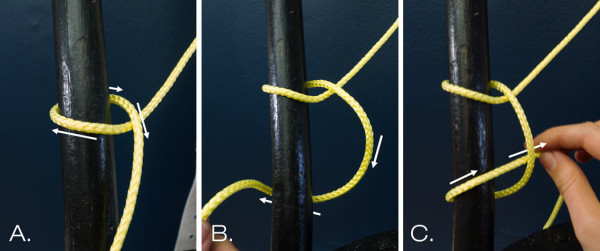
A. Take the rope in front of the post, loop it behind the post, and then lead the rope over itself and down.
B. Bring the rope behind the post again, keeping it slack.
C. Lead the rope back through the slack loop you just created.
Then pull everything taut, and thread through the back of the next hole.
Repeat A-C on the opposite side, and work your way down the panel, switching between the left and right sides to keep things straight and even.
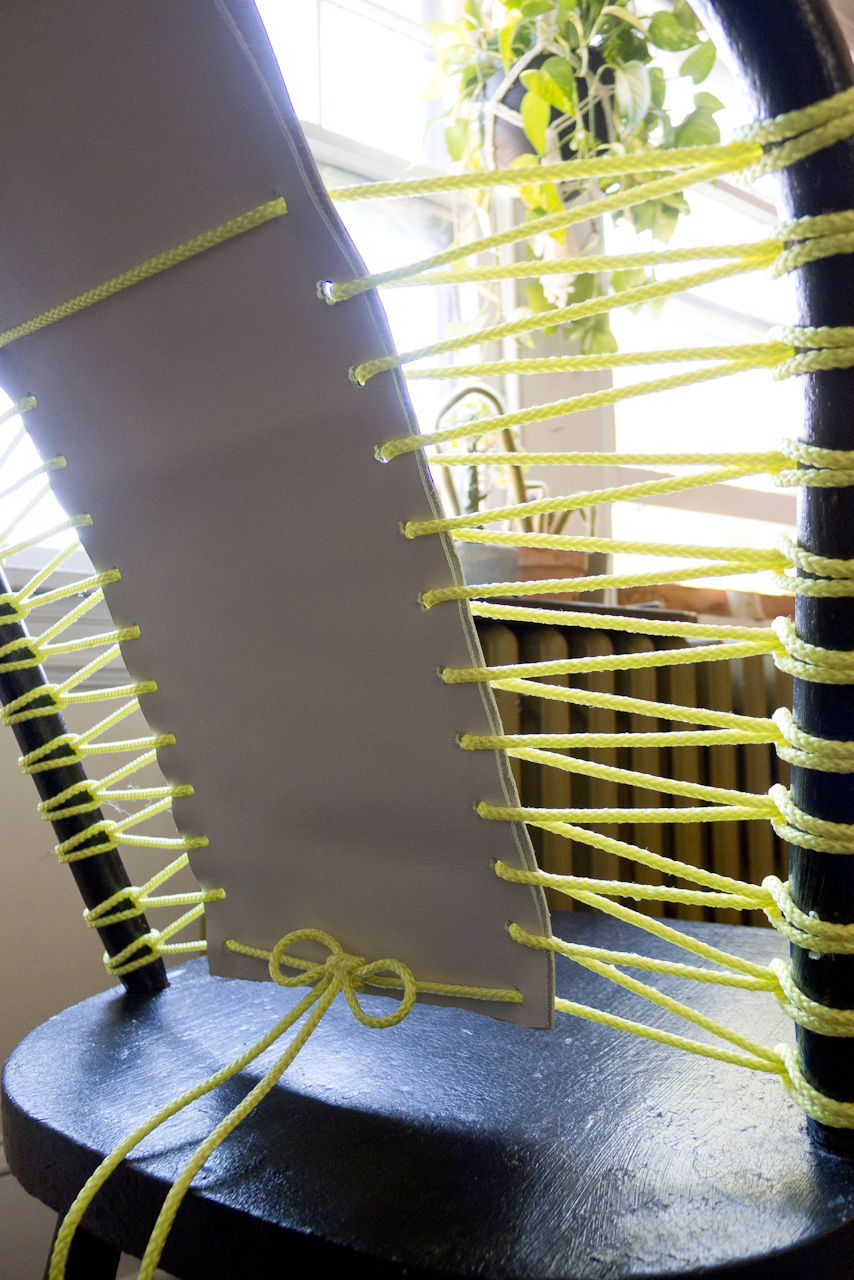
Step 7:
For the last holes, thread through the FRONT of the leather panel, and tie off in the middle of the back.

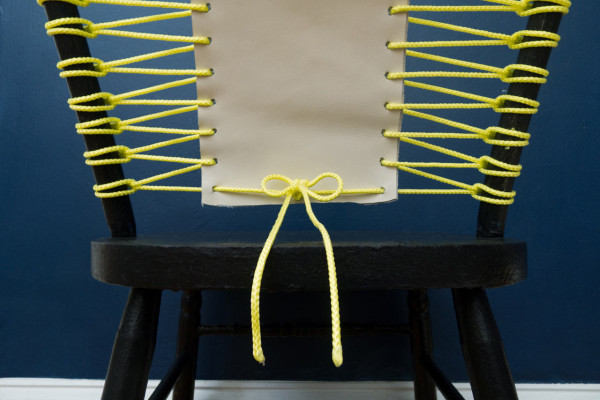
You can use a square knot, but I liked the idea of having a little bow back there. For extra security, a dab of super glue in the center of your knot will hold everything in place nicely. Trim any excess leather and rope with a craft knife, sit back, and relax!
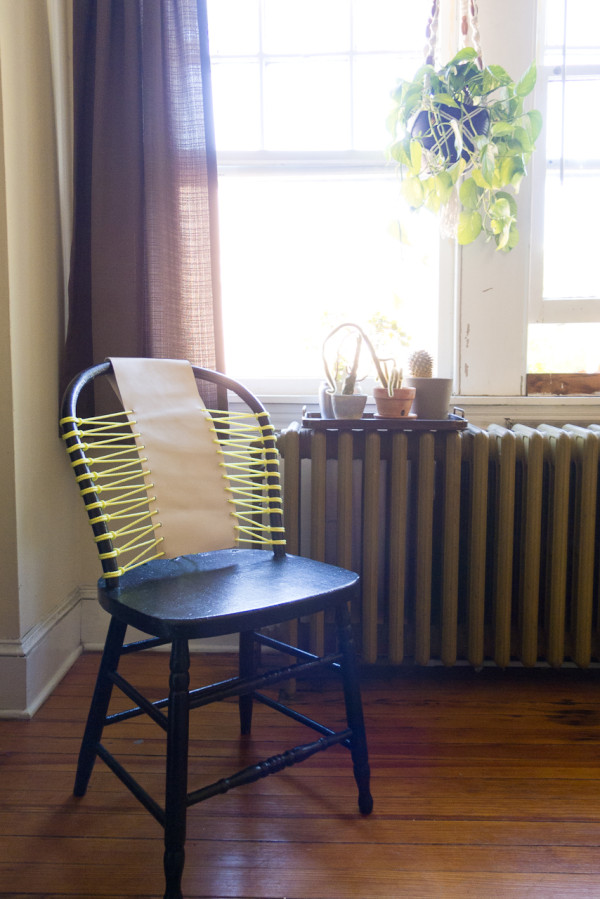
Because the hoop of this chair came forward a bit, the new back made it even more comfortable than it had been originally because of the added lumbar support. How fancy.
Some of my favorite old-furniture-refinishing links:
– Refreshing Vintage Wood by Morgan Satterfield of The Brick House
– How to Paint Furniture and Thrift Store Chair Rescue by Young House Love
– How to Restore Thrift Store Furniture, The Secret to Successfully Painting IKEA Shelves, and How to Cover Up Dings in Wooden Furniture by Apartment Therapy