


San Francisco-based Zai Divecha is an artist transforming plain white paper into geometric works made by repetitive folds and pleats. She makes the intricate works by folding or pleating paper to form patterns of light and shadow. From tiny paper star tutorials to massive wall installations, Divecha’s pieces visually delight the eye making you almost forget that they began as paper. The monochromatic palette makes the patterns and textures pop simply by how the light hits them, hopefully leaving viewers feeling “centered, quiet and focused.” For this month’s Deconstruction, Divecha shares one such folded pattern which becomes a shadowbox framed piece called Torus.

Zai Divecha working in studio

I work in a bright, sunny studio in the Inner Richmond in San Francisco. I rent space from Yonder Shop, a ceramics studio and beautifully-curated shop that’s in the other half of the building. It’s a sweet little community of makers.

I often start by making small models and prototypes to test out various paper techniques. I don’t usually do sketches, but I’ll often draw a very basic diagram in Illustrator to figure out the overall proportions and layout. Before I decided to make Torus, I tried the same pleat pattern in a few different sizes – you can see the large versions at the top right, and then a tiny version at the bottom right. I landed somewhere in between the small and medium versions. Because the layout of this piece is so simple – essentially just a circle inscribed in a square – I didn’t feel the need to do any sketches.


When I first started working with paper, I used to measure out a grid by hand, draw each score line with pencil, then score all of the lines with a bone folder. It was pretty time-consuming, so eventually, I switched to using a machine to cut and score for me. Now I draw my patterns in Illustrator and use a plotter cutter to make the cut and score lines in the paper. It gives me really precise lines, and it allows me to focus on the fun part, which is the folding.

For some lines in particular, I do prefer a hand-scored line over a machine-scored line. For this particular project, I manually score all of the folds that touch the outer edges. It gives me a crisper fold that just looks cleaner along the edges. To make my score lines, I use the backside of a craft knife that I sanded down to a dull edge. The kerf is narrower than that of a bone folder, which is useful for pieces this intricate.

There are lots of different ways to pleat paper, and everyone has their own system. I personally like giving each line a quick little fold just so it knows whether it’s going to eventually be a “valley” fold or a “mountain” fold. This makes the next steps a little easier.


The pleating is the fun part! I fold the strip into a little accordion, and then pop each fold in or out as needed. This is my favorite part of the process – it’s a little bit challenging and very satisfying.

I try to batch-process my work whenever I can. It helps me get into the zone, and I’m more efficient when I’m able to repeat the same step for many different pieces.

I connect the ends, and affix them with bookbinding glue, which is a type of PVA glue. I use bookbinding glue because it dries clear and flexible, and is acid-free and archival-quality.

Then I mount the little donut to a backing sheet, using a template to help with alignment.

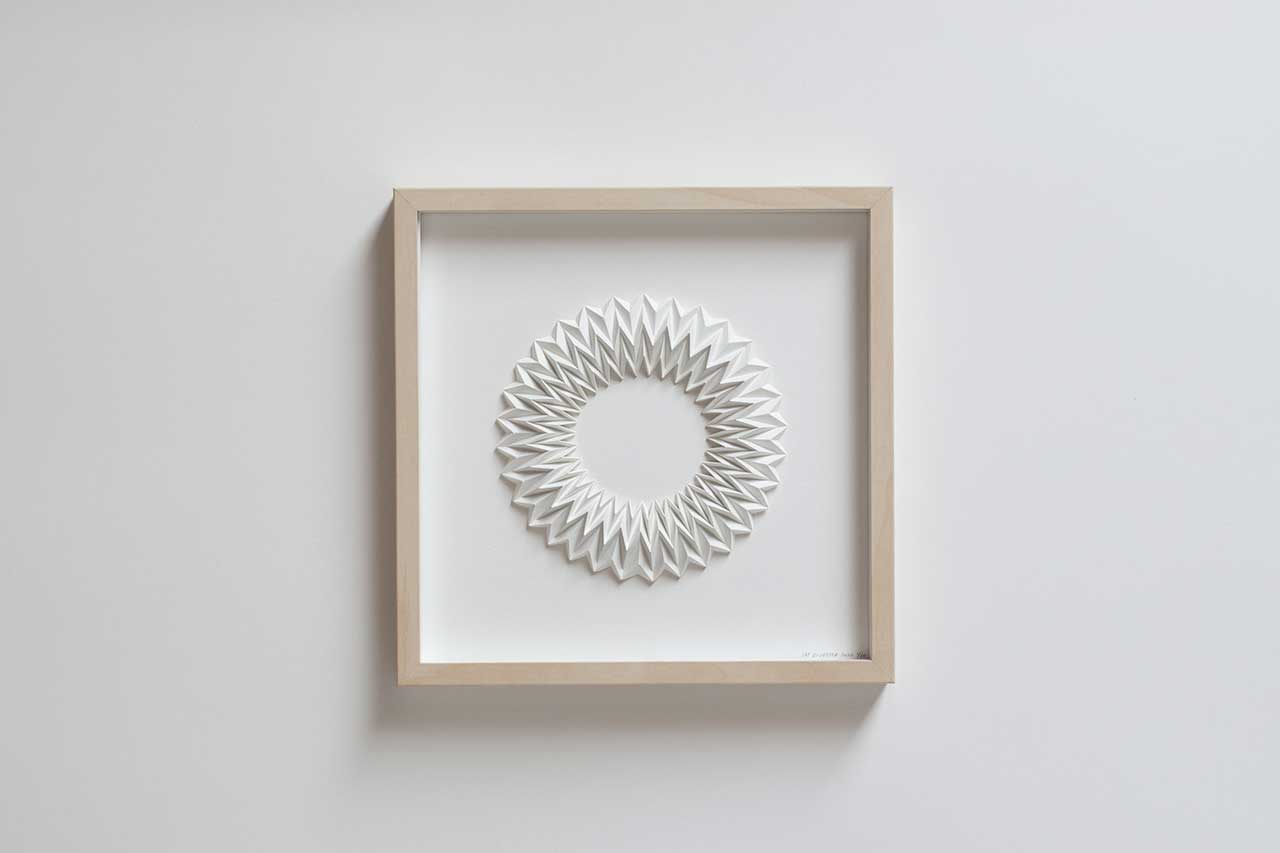
Here’s the finished piece in its shadowbox frame.

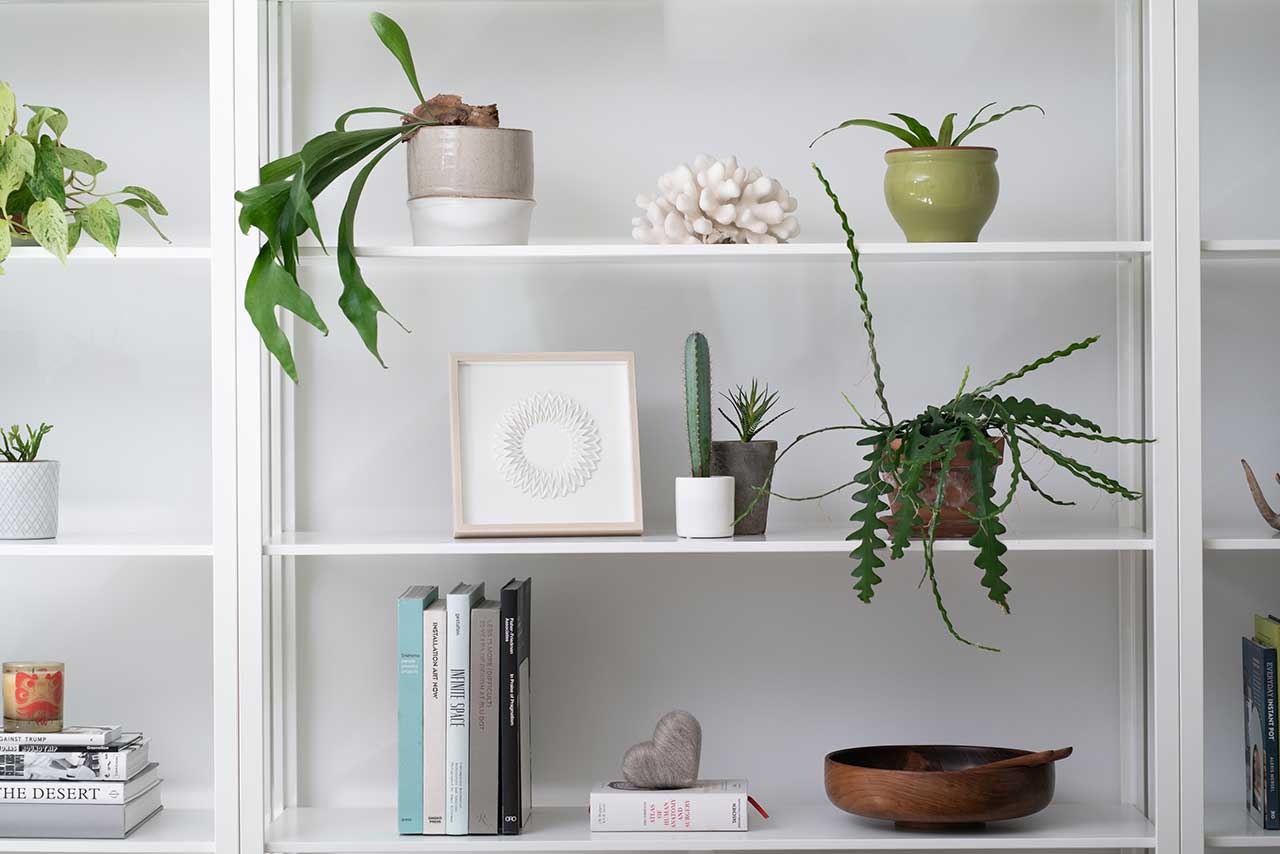
Here’s Torus on my shelf at home.